Beginner
|
43 min 19 sec
|
01:19
|
|
01:07
|
|
01:37
|
|
03:27
|
|
02:32
|
|
20:49
|
|
12:28
|
Creative Sketchbooking
Now Playing
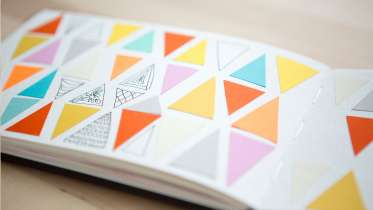
Part 1:
Creative Sketchbooking: Playing with Pens and Paint
In this first class, Pam Garrison shares simple exercises for releasing creative inhibitions in your sketchbook. You will use both your dominant and non-dominant hands to create blind contour drawings that look like mere scribbles on paper, then use a colorful paint palette to transform those scribbles into thoughtfully painted shapes. This exercise results in aesthetically pleasing sketchbook pages that are created through the process of intuitive creative exploration.

Part 2:
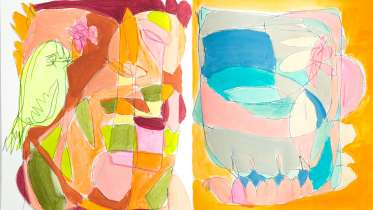
Creative Sketchbooking: Painted Backgrounds and Responsive Drawing
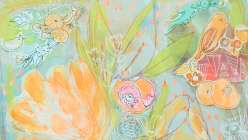
Now that you’ve had a chance to practice with pens and paints, let’s play with a few new mediums. In this class, Pam shows how to create watercolor backgrounds in a variety of colors and brushstrokes. Allow yourself to see whatever shapes come to mind and loosely outline them with pen. Add pops of color with brush pens and colored pencils, or leave your composition as is—let your creativity take the lead.
Part 3:
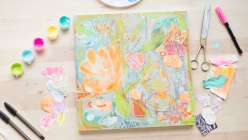
Creative Sketchbooking: Playing with Collage
Now that you’ve created several spreads in your sketchbook, learn how to add elements of collage and hand lettering. Using cut out cardstock shapes or old paint chips, learn how to use collage to cover up unwanted doodles or to add extra dimension to your background. To complete your composition, use hand lettering to fill in blank spaces with a favorite word or quote. Best of all, Pam shares various techniques to create your own unique lettering style.
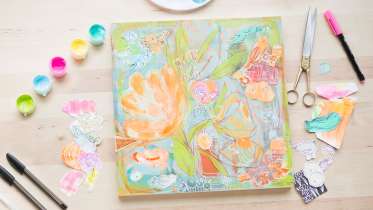
Part 4:
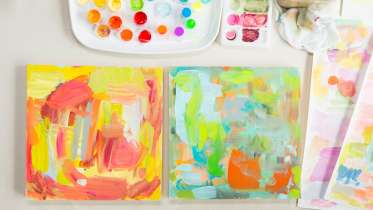
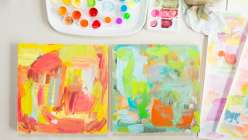
Creative Sketchbooking: Out of the Sketchbook and Onto the Canvas
Combine all of the techniques you’ve learned in this course to create a cohesive and stunning piece of wall art. Before you get started, you’ll need to decide which mediums and techniques you’d like to use in your artwork. Once you have a rough plan, Pam will walk you through the process of pulling these elements together to create an expressive statement piece.

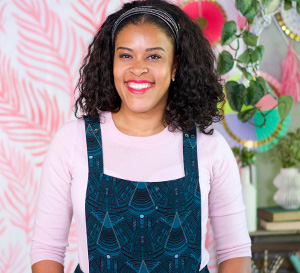
Taught by Pam Garrison
Start Free Trial or
Buy For $29.95
Combine all of the techniques you’ve learned in this course to create a cohesive and stunning piece of wall art. Before you get started, you’ll need to decide which mediums and techniques you’d like to use in your artwork. Once you have a rough plan, Pam will walk you through the process of pulling these elements together to create an expressive statement piece.
Learn how to:
Here’s what you’ll need:
- Two sketchbooks of any size with paper that can handle water (Pam uses a mixed media sketchbook and a watercolor sketchbook)
- Waterproof ballpoint pens
- Black and white gelly roll pens
- Uni-ball pens
- Paintbrushes for acrylic painting (Pam uses a simple variety 6-pack from Michaels)
- Paint palette
- Craft paint in a variety of colors (Pam uses a vibrant selection of neon and bright colored paints but you can also use primary colors or any colors of your choice)
- One sheet blotter paper or watercolor paper
- Wood panel or canvas board
- Copic pens
- Mod Podge
- Foam brush
- Colored brush pens or markers
- Colored pencils
- Pencil sharpener
- Adhesive tape runner
- Eraser to clean up edges of tape runner
- Scissors
- Travel set of watercolor paints
- A few sheets blotter paper or watercolor paper
Downloads:
- Create a stunning piece of wall art by using different techniques
- Work in mixed media
- Blend collage, watercolor, and doodles
Member Gallery
Browse members' projects from this class and share your own work! Learn how to take great photos here.
Load More
Transcript
Class PDF
Creative Sketchbooking: Out of the Sketchbook and Onto the Canvas Reviews
4 users recommended this class to a friend

Bianca Smeets
Wow, this opens up a whole new world for me!! Using cheap paint and just play sounds so freeing. I'm off to buy many different colours. Yay!!
More than 3 months ago

Louis Stark
not my medium.
More than 3 months ago
Related Classes