All levels
|
32 min 34 sec
|
01:17
|
|
01:06
|
|
08:51
|
|
05:07
|
|
06:31
|
|
02:53
|
|
06:49
|
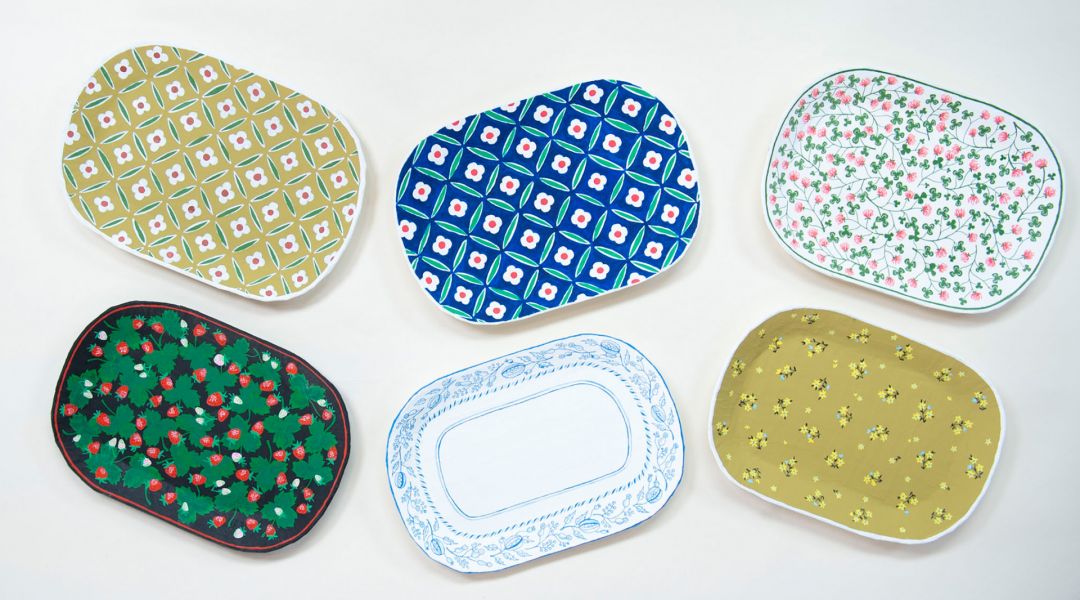
Papier-mâché has a long history of being used for decorative objects, and people have been making paper maché trays since the 18th Century. Corrie Beth Hogg is a multi-media maker and author, and she teaches you how to make your own paper maché tray. This is a kid-friendly craft, easy to make, and great to gift, plus a fun opportunity to upcycle cardboard and paper. Corrie provides a template and teaches you how to cut and score a flat piece of cardboard and turn it into a three-dimensional tray. Learn Corrie's tips for preparing paper strips, her favorite paper maché paste, and her method of applying paper maché. When you're ready to decorate your project, Corrie teaches you how to transfer a design template onto your tray and how to create your designs with paint pens. These paper maché trays are long lasting, and you can put them in your entryway, on your bedside table, or hang them on the wall.
Learn how to:
Here’s what you’ll need:
- Printed out PDF templates (below)
- Scotch tape and masking tape - varying widths are handy
- Scissors
- Ruler
- Craft knife or X-Acto knife
- Cutting mat
- Pencil
- Cardboard
- Newspaper
- Paper mâché paste - (Corrie uses Titebond III)
- Plastic container for paper mache paste
- PVA glue, primer or gesso
- Sanding block (60 grit)
- Acrylic paint and paintbrushes or paint markers
- Stir stick
- Sealant of your choice like Mod Podge or Golden matte acrylic spray varnish
- Optional: beverage lids or painter's pyramids, graphite transfer paper
Downloads:
- Make a decorative tray with paper mache
- Cut and score coardboard
- Transform 2D cardboard into a 3D shape
- Tear paper strips and make paper mache paste
- Transfer a design template onto your paper mache project
- Decorate with paint pens


Member Gallery
Browse members' projects from this class and share your own work! Learn how to take great photos here.
Load More
Transcript
Class PDF
Make a Paper Maché Tray Reviews
173 users recommended this class to a friend
Carrie Hartsell
I love the idea. It was a little more time consuming than I anticipated. However, the tray turned out amazing. I will be making another tray, but allowing more time. Thank you for sharing.
January 20, 2026
robyn
A really charming tutor :)
Clear instructions and easy to follow.
I am excited to make a few of these dishes for gifts.
December 30, 2025
Virginia Eger
Great instructions. Easy to follow. Inexpensive materials. Opportunities to express personal preferences in color and design. Printable pattern.
November 23, 2025


