Beginner
|
1 hour 23 min
|
01:11
|
|
04:29
|
|
19:41
|
|
20:14
|
|
26:28
|
|
11:52
|
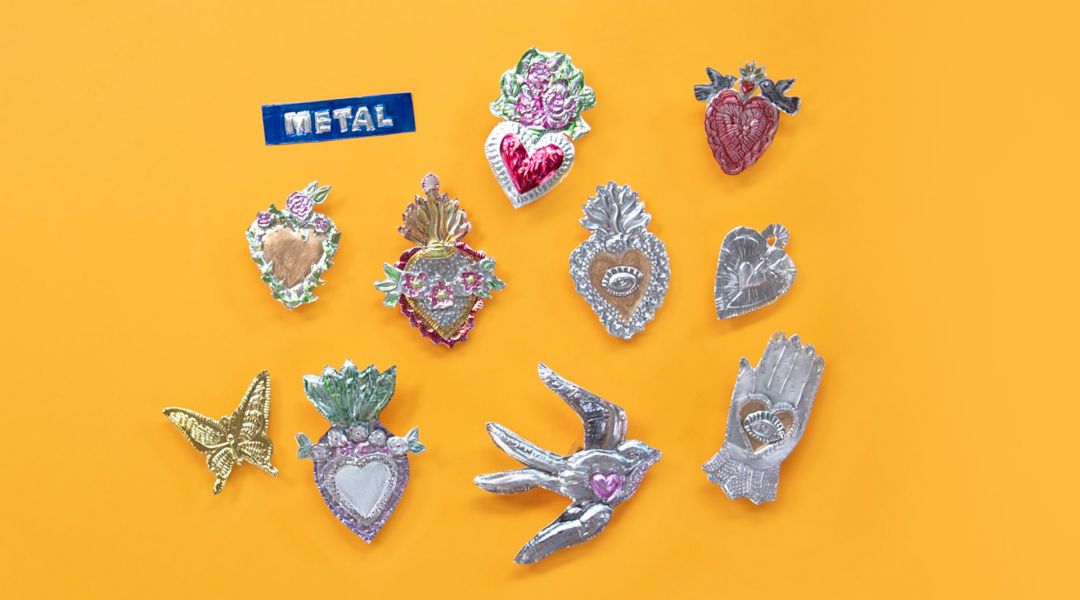
Learn how to emboss metal with artist Mia Semingson of Two Hands Paperie. Inspired by traditional Mexican tin art, Mia shows you how transformative and flexible metal can be - you can even use the metal from a tube of tomato paste or paint. She begins by demonstrating how to transfer a paper template to thin metal sheet, then learn how to push and pull the metal to create embossed textures and designs with tools you might already have on hand. Find out how to paint your metal projects with alcohol ink to add touches of color. Start with a metal test strip to experiment with your tools and paints, and then Mia will guide you through three different projects: a low-relief ornament with an image of a hand, a sacred heart which includes layered pieces with lots of dimension, and a high-relief embossed box lid which is a wonderful opportunity for upcycling.
Learn how to:
Here’s what you’ll need:
- Approximately 36 gauge sheet metal - copper, aluminum, brass, colored metals and/or recycled materials such as metal tubes of tomato paste, hand cream, toothpaste, etc.
- Alcohol inks and copic markers in a variety of colors
- Cloth rag
- Rubbing alcohol
- Alcohol ink cleaner
- Smooth work surface such as a masonite board
- Pad of paper
- Decorative paper
- Washi tape
- Double-sided tape roll
- Styrofoam pad and felt sheet
- Your favorite inspirational images from books/magazines
- Embossing tools: if it makes a mark, it can be used as a tool. Try out a ball stylus, mechanical pencil, ballpoint pen, sharpened pencil, paper stylus, wooden chopstick, etc.
- Teflon tool or bone folder
- Fine Sharpie
- Ruler or gridded quilting ruler
- Scissors dedicated to metal
- Paper towels
- Green scrub pad
- Metal spoon
- Puffy glue dots
- Hot glue gun
- Cotton swabs and cotton pad
- Tracing paper
- Fine brushes for painting
- Paint palette
- Metal candy box
- Sand paper
- Take inspiration from cookie cutters, stencils, magazine images, photo copies, and favorite objects
- Rubber stamps and metal stamping ink (optional)
- Rustolem clear lacquer spray (optional)
Downloads:
- Emboss metal with basic tools
- Trace a paper template onto metal
- Create high relief and low relief embossing with various tools
- Paint metal with alcohol ink
- Layer embossed metal pieces
- Add embossed metal art to the top of a candy box


Member Gallery
Browse members' projects from this class and share your own work! Learn how to take great photos here.
Load More
Transcript
Class PDF
Decorative Metal Embossing Reviews
58 users recommended this class to a friend
Stephanie Leisering
Very fun class with lots of helpful tips and tricks for making beautiful embossed metal art
More than 3 months ago
Sue Hennig
Mia makes what looks like a difficult process simple and as such
I can't wait to try it.
Thank you Mia
More than 3 months ago
Elizabeth Walker
What a delight, to learn so many ways to emboss and play with metal and paint. I wanted to learn this for a long time, and now I have loads of techniques--thrilled!!!
More than 3 months ago


