
All levels
|
28 min 52 sec
|
01:06
|
|
00:45
|
|
04:54
|
|
13:04
|
|
09:03
|

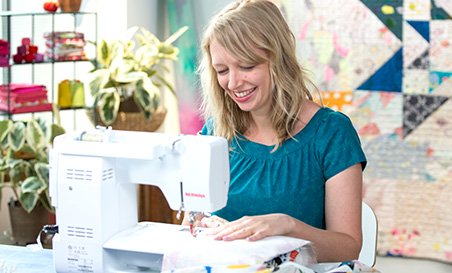
Taught by Annabel Wrigley
Start Free Trial or
Buy For $19.95
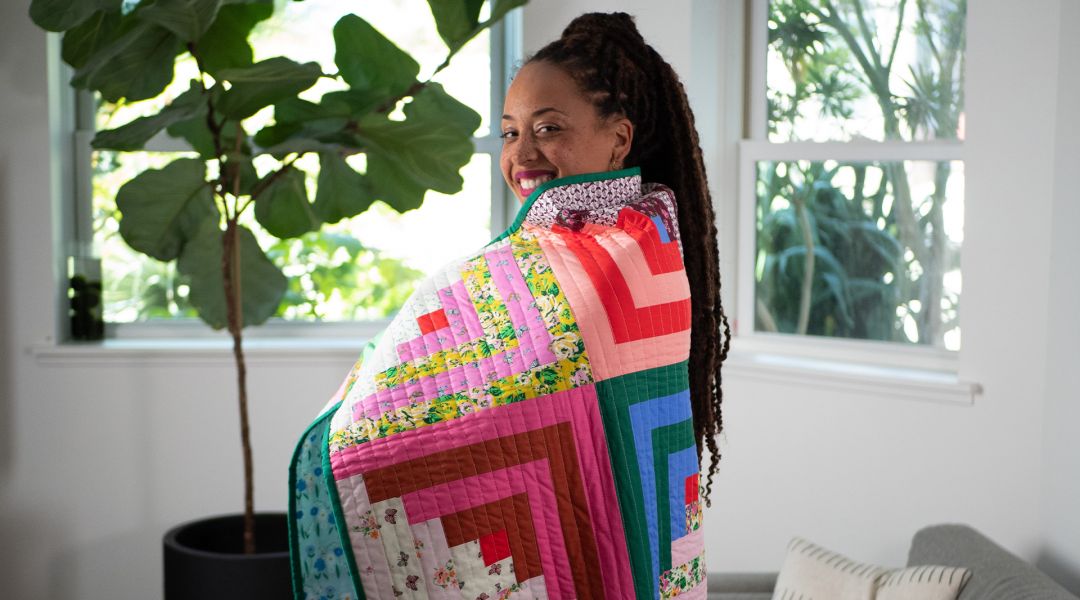
In this beginner-friendly class, author, textile designer, and modern-quilter Annabel Wrigley teaches you how to make log cabin quilt blocks, then how to sew them together into a lap-sized log cabin quilt top. Begin with planning your design, choosing fabric colors, and cutting fabric, with several layout options provided in the class PDF. Then, Annabel will show you how to sew the log cabin block. Seaming your blocks together is a breeze, and by the end of the class you'll have the skills to create a log cabin quilt as small or as big as you wish. Once you start sewing one log cabin quilt block, you won't want to stop.
Learn how to:
What you'll get:
Here’s what you’ll need:
- 2" fabric strips cut from a variety of solids and prints, no longer than 14". You can start with 1/4 yard each of 6 prints and 6 solids - make sure there are some light colors and dark. colors
- Quilting rulers - a longer one for cutting strips, and a smaller one for trimming blocks
- Fabric shears
- Rotary cutter and mat
- Spray starch
- Pins
- Seam ripper
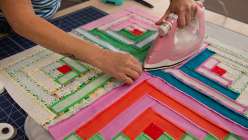
- Iron and ironing surface
- Sewing machine and a neutral thread color
- Optional: 1/4" quilting foot
Downloads:
- Make a lap-sized modern log cabin quilt top
- Plan your design and colors
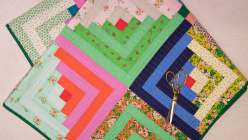
- Sew a log cabin block
- Sew quilt blocks together
What you'll get:
- Video lessons on how to design and sew a modern log cabin lap quilt
- 5 HD video lessons you can access online anytime, anywhere
- Detailed supplies list
- Step-by-step expert instruction from artist Annabel Wrigley
- The ability to leave comments, ask questions, and interact with other students


Member Gallery
Browse members' projects from this class and share your own work! Learn how to take great photos here.
Load More
Transcript
Class PDF
Make a Modern Log Cabin Lap Quilt Reviews
196 users recommended this class to a friend

Arely Celis
Very well explained step by step.
More than 3 months ago
Carol Griffith
Instructions were clear and I'm going to enjoy making this quilt
More than 3 months ago
Annie Godette
Very easy to follow thank you
More than 3 months ago
Related Classes